

Showing posts with label Dota 2. Show all posts
Welcome to our giveaway page. This page is for activating giveaway codes which have been given out by various organisations and personalities.
Giveaway Link : Click
Proff :


AS SEEN & HEARD ON:

Dota 2 Item Giveaway !
0
After going through different phases from a total newbie player to someone who is useful to his team, I have learnt some valuable lessons about DoTA 2 which I want to share with you. This guide will help you improve your game. Don’t worry, this game is relatively easy to understand but hard to master. How to play it though is still pretty straightforward. I can help you out for the understanding part. And even if you consider yourself a good player, read through the tips, as they might have some new information.
If you are a good player, read our more advanced guide.
Updated for- 6.83c.
Don’t auto-attack the creeps

We commence this list starting with the most annoying mistake: Don’t auto-attack the creeps! Now, this may seem counter intuitive, but the idea is to always aim for the last hit only! Just get the gold and stay in the same position. Don’t push! (That means going on the offensive) Do this so you can farm up quickly and get some valuable XP (“Farm” means getting XP and gold through creep last-hitting).
One of the critical mistakes new players often make is to push too hard early game! They often go near the enemy tower and then retreat with low health. Sounds familiar? The only thing this so-called strategy does is to give the enemy some free farm. Not only this, but it also allows an enemy hero to flank you from behind and get an easy kill. Since you are so far from the safety of your tower, you will probably die very quickly. Another important concept is denying creeps. What you do is manually press the attack button and kill your own creeps when they are about to die. “Why would I kill my own creeps?! They are my friends!!” you may ask. A simple reason is that, when you deny them, you do two things: you take away your enemy’s chance to last hit while getting the bonus gold. And you deny him some XP. It has more pros than cons.
The boots mistake
 Okay, I’m gonna tell you something, so listen well! I have seen two types of newbies, some who quickly save up and buy boots as their first item and others who don’t buy them at all. Keep this in mind: Boots are important! But not so important to go for them as a first item. Let me explain! Stat enhancing items are your top priority at the beginning of the game. These include Iron Branches, Circlets or Gauntlets of Strength. And some potions if you are playing a low HP hero.
However, after you get all your starting items, go for boots with the first 450 gold you get! You just don’t have to worry about them in the first 3 minutes. In addition, the small lane side shop sells boots, you don’t need to send a courier to base for it! That same side shop actually sells ingredients for upgraded boots as well (sadly, not for Tranquil and Travel boots).
TP Scrolls are your friends
 You know what really grinds my gears? Not buying TP scrolls. You need them after the first 15 minutes. I have actually seen many so-called pro-games in which they make this one mistake. “If they do it, why shouldn’t we?” you’ll say. Well, TP scrolls give you two big advantages. First, they give you a way to escape back to base in order to heal up if you are low on hp (an easy trick- quickly press the teleport key twice to automatically go to base). Second, they also allow you to go quickly to other lanes for a surprise gank (“gank” is for gang killing). Also, when you die, just buy a TP scroll to get back to your lane. “But it’s expensive!” you may scream. Actually, it’s not! A TP scroll only costs three last hits! And if you don’t get back to your lane ASAP early game, you will most likely be a level lower than everyone. else – obviously, not good. If you are having trouble staying alive in the lane, buy a Ring of Health from the extremely underrated side shop. It would give you valuable health regeneration. In the end, remember that a bad start is hard to recover from, but TP scrolls definitely help!
Don’t Flame!

Look, you are new to this game, so… you are probably bad at it. People will complain a lot, they will curse you a lot, and for your first 50 games, you will be called a “noob”! However, remember everyone starts out like this! It’s a rite of passage! Don’t start flaming everyone, defending yourself or even saying sorry. Actually, you don’t need to say anything! (other than calling missing or requesting ganks). If you start cursing your teammates, you automatically ruin the team’s synergy. Also, you waste time typing rather than last hitting, which, if you remember our first point, is pretty important!
In the end, you will probably get reported and sent to the dungeons called *gasp* Low Priority. Just be nice to everyone and if need be, tell them that you’re new. They’ve all been there, they’ll understand! To be safe, however, it’s always a good idea to try out new heroes on bot matches, rather than going straight to the online arena.
Know your role!
 Every hero has a role to fulfill in this game, and if anyone fails to do it, your team will have a bad time. Now the main important roles are carry, support, mid, and ganker. The ganker goes in a gang and kills and harasses the opponents, the mid plays on the middle lane alone and levels up fast and helps his other lanes when he gets an opportunity (TP scrolls are important for him, and a very stressful yet fun role to play in my opinion), the carry is very weak early game so he needs help staying alive but after enough farm, he can wreak havoc on the enemy, its also the hardest role to play because of a difficult early game. Lastly the support, he buys wards, the courier, and keeps his team alive through healing or sacrificing himself so the team can run away. Also its the easiest role to play, good for starters.
The usual format for a normal match in medium skill games are 2 supports, 1 mid, a ganker and a carry. And where the 2 supports make a baby sitting lane for the carry (so 3 on one lane), the ganker goes alone, and so does the mid. But remember adapting is critical, and in many games going 2:1:2 is better. When you pick a hero you see a small icon next to him in the hero selection screen, look at it, it tells you your role. Is it only for reference though, its very easy to switch roles with the right items and some creativity. Make sure you know what you are getting into, if you picked support, you are expected to ward, if you picked a carry, you are expected to dominate your enemies after a certain point, and so on. Also, you should know that picking a ranged hero is almost always easier than going melee. Since I mentioned hero selection, you should know what to skill first. Always, and I mean always level up a stun or slow. That’s like a rule, you need to stun your opponent so you can escape or kill him, depending on situation, but always useful. And for starting items, shield, tangoes, clarities are the way to go. The purpose of the early game is to stay alive. Also never ever buy a bottle unless you are playing mid (there are a lot of exceptions for the mid player, I can make an entire list for them).
Rune control
 Runes are awesome, they cannot be underestimated. They give you a significant edge in battle. I won’t go into the details for each type of rune because its pretty intuitive, I just have some tips for you. Firstly they respawn every 2 mins, keep an eye on the clock. Also keep looking at the map if you have wards in place (more on that in the next point), its also important to know if your lane enemy has picked a rune. If hes glowing blue, get the hell out, he has double damage. Also you can bottle a rune for later use, by bottling which means that when you have a bottle, and you pick a rune it gets stored for later use. It also refills your bottle. Just remember that the rune expires in a few minutes and if you don’t activate it it will just activate automatically at a certain time.
Illusion runes are worth mentioning, they give you two clones of yourself. Use them for scouting other lanes and for fooling the enemy into attacking them. They are also pretty strong and if you have orb effects they will apply to them too. Another advantage is that they allow you to tower dive (going right under the enemy tower for a kill), as they buy you time since the tower will probably attack the wrong hero, if not there is a way to fool the tower (more on that later).
Wards and courier
 If your team doesn’t buy a courier and doesn’t ward, you’re probably gonna lose. Even if you aren’t a support but your team doesn’t buy a courier just suck it up and buy it yourself. Here is a little trick with the courier, you don’t need to go to the base yourself to spawn it. Just buy it while you are in the lane and right click on the courier and drop it from stash. Now anyone can just go to base and spawn it for you, and considering how your team was reluctant on buying one in the first place, its going to be very soon. Now for the wards, they last for a limited time so they constantly need to be replaced. You need to know what is going on in the river and the jungle because they are big blind spots. Without wards you are just asking to be ganked. To ward just buy them and place them on the giant eyes you see. A ward near Roshan is also essential mid game (or early game if they have an Ursa, as he can do a very early solo Roshan, with the right items).
And if you are laning against heroes who go invisible, buy sentry wards ASAP. Sentry wards can also “see” enemy observer wards which you can then swiftly remove, or just keep them there and fool the enemy into thinking you are stupid. If you lose a tower, place an observer ward where the tower fell just to know whats going on beyond your field of view. Also you should know that your field of view is reduced drastically at night time (except for a few nocturnal heroes). Lastly placing wards in the enemy jungle, will not allow the jungle creeps to spawn, hurting his early farm capability. I will go into detail about the best places to put sentry wards in the jungle in another guide.
Make tower stop attacking you
 I mentioned before that having illusions allows you to tower dive if the tower goes after the wrong hero (i.e your illusion), but how do you fool it? You may ask. Well here is a neat little trick, when the tower is raining destruction on you, just right click a creep which is close by, or an illusion of yours or if you are feeling particularly evil, another friendly hero. The tower will just redirect fire towards it. This is not a glitch or something, it’s a feature. Even with creeps, if they are attacking you, just right click your friendly creeps and the enemy creeps will focus on them instead of you. This little trick saves lives. Also you should know that first tier towers don’t have backdoor protection, meaning you don’t need your creeps near it to destroy it. If you see a low health tower, just go and finish it off, don’t wait for your creeps or for an enemy hero to deny it, yes you can deny towers too. It makes you lose that nice bonus gold your whole team gets. Lastly barracks (short form is “rax”) are a priority, destroy the enemy rax and your creeps will upgrade to “Mega creeps” gaining more health and damage. Makes the game much easier.
Detection items
 Staying hidden or exposing hidden units is a big part of this game. I have seen games turn around with a well used smoke or dust. So what are they? Smoke hides you and all units around you for a period of time, and dust exposes hidden units. Dust is just like sentry wards, just lasts less longer and is more mobile. If you are playing against highly mobile invisible heroes, buy dust and expose them before they kill your team, if you are losing or want to surprise the enemy, smoke your team and go in. Just remember attacking something breaks the smoke spell or if you get too close to an enemy tower. Smoke also gives you a movement speed bonus. Smoke is most useful if you want to go to Roshan undetected as its almost always warded and smoke bypasses wards. Since we are on the topic of avoiding the enemy, if you are running away with low health from the enemy, just run in a zigzag motion across the jungle, never in a straight line.
Never fight uphill
 A classic noob mistake is fighting an opponent who is on higher ground. You are missing 25% of your attacks while you can hardly see anything due to the fog of war. While on the other hand, your opponent, who is on higher ground can see you and knows that 1/4 attacks of yours are gonna miss. Never give that advantage to an enemy. Always be on higher ground or avoid the fight.
This is it for now, leave a comment if you have a question. And if you want to learn more, head on over to the part 2 of this guide, with advanced tips.
TOP 10 DOTA 2 NEWBIE TIPS 2015
0
After writing the extremely popular DoTA 2 tips guide, I have finally decided to write a more advanced guide. Now unlike the previous guide, I will assume that you are a seasoned player as the tips I am about to tell you require basic game knowledge. Here are the top 10 DoTA 2 advanced tips. Don’t fret though, as I will still try my best to explain the concepts in as much detail as possible. Should be straight forward to follow.
Stacking Camps
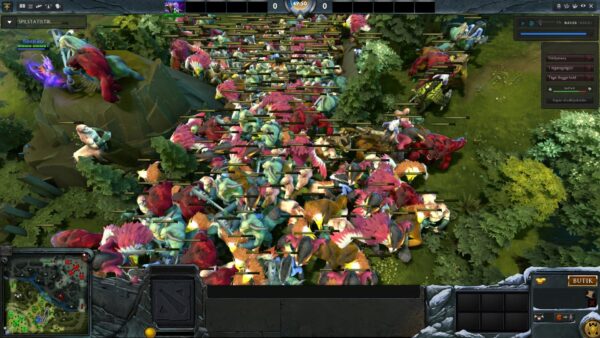
You might have already heard these terms before. The concept is that, rather going to a jungle camp, clearing it and then waiting for it to respawn. If you lure the creeps out at just the right moment, a new batch of creeps will spawn in their place. So now you have two creep batches in the same camp. If you repeat a few times, you can end up with a lot of creeps in one camp, which you can swiftly clear with your ultimate (or let your ungrateful carry do it), for a huge lump sum amount of XP and gold.
So basically for simply stacking camps (including ancient camps), at exactly the 55 second mark, attack the creeps and make them chase you. When the start slowly retreating, a new batch would have already spawned there. Repeat as necessary. Remember creeps can spawn every 1 minute (x:00). Also if you lure the neutral camp creeps into fighting with your creeps, you can pick of some easy last hits.
Basi Micro
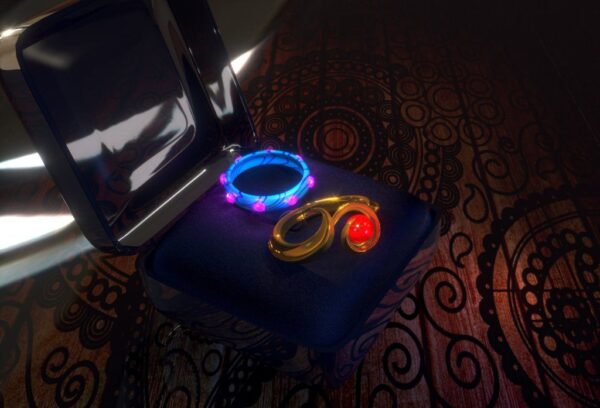
The name is short for: Basilius Micromanagement. This is a pretty sneaky and mostly hilarious tactic to throw your enemy off. Works best in solo mid. Basically, when your enemy is attacking your creeps leave the Ring of Basilius off. The moment he goes for last hits, suddenly turn it on, the armour buff will make them take less damage making him miss his last hits. Then just deny them. The trick is to be unpredictable on how you use it, so the enemy can’t figure out why he is missing his last hits, and to ruin his mental estimation of his damage. Also to piss him off.
Courier Express Service (CES)

I will mention some tricks to help you maximise your efficiency in using the courier. Some of you might have heard this strategy already, its called ‘Crowing’. Lets start with a basic trick, when you are playing mid, have the courier standing a little outside the fountain. So when you buy your bottle, it will be delivered faster, saving you a few seconds.
I will also cover some ideas about shift-clicking. Shift clicking is mostly used for queuing. A time saving trick is to drag an item onto the shop keeper from some distance, and then shift-click away. For example, you want to get rid of a useless item, give it to the courier, then drag that item to the shopkeeper. So now the courier will sell the item the moment it reaches the fountain. Or you want to sell a tango in the side shop, drag it on the shopkeeper, then shift click away. The moment you get in the ‘buying range’ it will sell and you can quickly buy what you want and return to the lane.
If you want to understand this concept better, and try new time-saving tricks go here.
Buyers Remorse
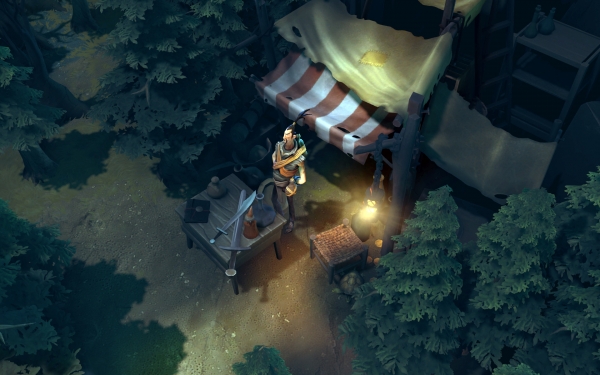
This is a very simple trick which can make you last in the lane longer. When you are low on health and near the side shop, buy a Ring of Health and enjoy some regen, and then sell it before 10 seconds. You get a full refund, and more health, without losing any money. And then repeat this a few times. The only skill this takes is, timing it correctly. And the only flaw is that you miss some last hits. Keep this in mind as an emergency tactic to use, and not begging teammates for tangos, going all the way back to base or calling up the courier all the way from the base just for a potion.
Hand of God

Ok , I am about to blow your mind. If you have read my previous list, you probably know that you can redirect creep/tower aggro, by pressing the attack button and then clicking on a friendly creep/hero. Well you can redirect creep aggro globally. This means that it doesn’t matter where you are on the map, as long as you are in a 500 range of creeps. You can do the attack key anywhere on the map, and the creeps (and towers) of that area will redirect their aggro. This would be super useful when you are trying to save a friendly hero.
Not only this, but you can also right-click an enemy hero (anywhere on the map) and that will redirect your creeps (the ones closest to the hero) and the friendly tower aggro towards them.
Blocking Enemy Farm
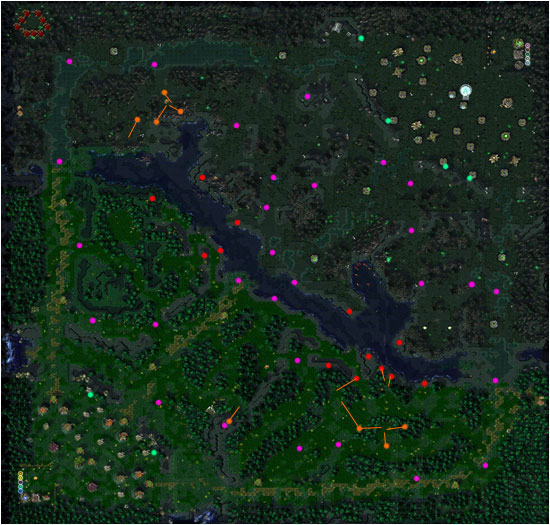
If you are playing offlane, buy wards. This is the single most useful item you can buy. Go straight for the enemy neutral camps and ward the hell out of them. If you are playing support, you cannot win the game unless you block the enemy ancient camp. An extremely effective tactic is to buy three wards, and put them on the enemy farms which you think they will need the most.
As promised before, I added a map with the best places to ward. Red spots give you rune sight, orange block creep camps, purple are critical choke points worth to keep an eye on, and green give you base sight.
Bottle Refills and Being Nice
When a friendly hero just tp’s to your lane, just hand them your almost empty (or totally empty) bottle. It will automatically refill, now you just have to convince them to give it back to you. The bottle gets refilled because freshly tp’ed heroes have the fountain’s regen buff on them, and giving the bottle then refills it.
Another tactic is to basically give your bottle to who needs it the most. If your partner is low on health, give him the bottle to use all charges, and then take it back. If you are on low health and need to go back no matter what (the bottle is not enough to bring you to a respectable health level), give your teammate the bottle, tell him to use all the charges, then take the bottle back to base. It will allow them to stay in the lane longer and cover for you. Lastly the ‘pass the rune tactic’, which means that when you see a rune and you don’t need the rune yourself, but you do need the recharge for your bottle. Give the bottle to your ally, he will bottle the rune (and recharge the bottle), use the rune and then give you back a full bottle. It’s a win-win, he gets the rune, you get a full bottle.
Tread Switching

This refers to switching the focus of the Power Tread boots. The idea is to maximise what you have, you do this by:
- INT – Cast a spell
- STR – Getting attacked
- AGI – In a safe location, where you want to regen mana and health.
- Your main attribute – When attacking and general offensive play
Double Pulling
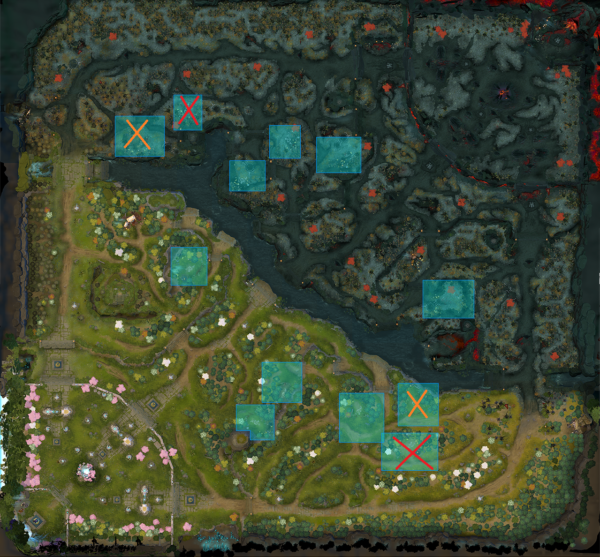
I mentioned pulling before, but as for the slightly more complex double pulling. Basically instead of pulling one camp of neutrals, towards your creeps, you pull two. An added benefit (other than a huge amount of XP and gold for you), is that you deny the enemy an entire wave of your creeps. For the Radiant, you go to the closest camp to the lane. Lure them out towards your creeps at the 45 second mark. Cut a tree at the top with a tango, and then pull the neutral camp right above it to battle which is raging below. Kill the remaining creeps for the first camp before the second camp creeps join the battle.
For the Dire, it’s easier as you don’t need a tango. At roughly the 42 second mark, lure the neutrals towards the creeps, to start the battle. Then rush towards the second camp, and make them join the battle, making sure that by the time they reach the entire first camp neutrals should be dead.
I put up a map to give you an idea. The red is the first camp, the orange is the second one. Here is a video link to help visualize it.
Reliable and Unreliable Gold

I have to admit I found out the difference pretty later on aswell. The concept gets a little confusing so I will simplify it for you. A common misconception about dying in the game is that you should spend all your gold quickly before you die, right? Well its the wrong. Let me explain. You have two types of gold: reliable and unreliable. You get reliable gold by killing heroes, couriers, Roshan, Hand of Midas, and destroying towers. The rest is unreliable gold (creep gold, starting gold, farming income, periodic gold etc). Follow me so far? Good. Here is where it all gets tricky, the game treats both these types of golds as different. When you die, you lose only from your unreliable gold pool (Hero level * 30). Secondly, when you buy items, the shop uses your unreliable gold first. Thirdly, and most important: buyback uses your reliable gold. So next time you are about to die, just buy some TP scrolls (create a keyboard shortcut for it), and you are good. Your hard-earned reliable gold is safe. But if you were farming the whole time, then its better if you buy an ingredient for whatever you were trying to make. Remember, always have enough reliable gold for a buy back.
Also if you hover your mouse over the gold HUD, it shows you how much reliable and unreliable gold you have.
TOP 10 DOTA 2 ADVANCED TIPS 2015
0A guide that hopefully solves typical problems beginners face. This is not a comprehensive beginner's guide, but it will hopefully help you enjoy the game and know what to do. The guide has a step by step walkthrough about what to do in a game, hero suggestions, a Dota 2 lingo dictionary, typical problems beginners face and how to deal with them, and more.
 Axe’s Battle Hunger: This move does damage over time (you will have a bull head above you when it’s active). However, you can get rid of it if you get the last hit on something, whether it be a hero, enemy creep, or even denying a friendly creep.
 Keeper of the Light’s Illuminate: This is a channeled spell which since a wave of damage hurdling straight ahead of him. The range on this is absurdly long, and it can do massive damage early in the game. However, the move is channeled, which means you can easily tell when he is about to use it, and thus you can dodge it easier.
 Silencer’s Curse of the Silent/Last Word: Curse of the Silent saps your health and mana, but can preemptively go away by casting a spell. Silencer will combo this with Last Word, which cause you to take damage and be silence if you cast a spell. If you don’t cast one, you will still take damage, and also be disarmed which means you can’t even auto attack. Heroes with spammable spells are good at avoiding this damage, and making Silencer waste his mana.
 Bloodseeker's Rupture: When he cast this on you, you will hear a loud sound and will start spurting blood. If you move, it will do additional damage to you. DON'T MOVE. Press H to make your character completely stop. He may come up to whack on you some, so you might have to retreat a bit given the situation.
 Venomancer’s Venomous Gale: Possibly the most devastating level 1 move in the game. It does initial damage, damage over time, and slows you down drastically. If you get caught off guard and he put this on you, you are as good as dead. The trick is to be very cautious around him early in the game. It also cost a ton of mana, so making him waste it would be beneficial as well.
 Witch Doctor’s Paralyzing Cask: An annoying stun that can hit you multiple times. It bounces from enemy to enemy, so if you are in lane, try to move away from the creeps when you see it coming.
 Dark Seer’s Ion Shell: He will put a purple bubble around a creep, causing anyone near it to take damage. If you can, try to focus on eliminating that creep as quickly as possible. Failing that, just move away from it. Dark Seer doesn’t have a whole lot of mana early on, so try to get him to waste that move.
Introduction
This is a Dota 2 guide for beginners that aims to focus on a lot of problems new players have. As someone who was completely new to Dota 2, I read beginner guides and was still confused. Ancient camp? Pulling? Jungling? ARE THESE WORDS? If you want a 100% comprehensive guide to every little thing about Dota 2, this isn’t it. BUT, it will hopefully help you work out the kinks of your growing pains and help you enjoy this great game.
WHAT AM I SUPPOSED TO DO
What’s the point of the game?
The point of the game is to destroy a structure in the enemy team’s base, known as the Ancient.
 Your team has to push all the way into their base. Think of it like scoring a touchdown, but with explosions. Pretty simple right? But before you get to wreck their crib, you have to push past defending towers, enemy NPCs, and enemy players.
What do you do? You kill enemy NPCs, heroes, and towers. How you will accomplish this is a whole other story, but let’s just focus on what you will be doing when you play the game.
The point of the game is to destroy a structure in the enemy team’s base, known as the Ancient.
Your team has to push all the way into their base. Think of it like scoring a touchdown, but with explosions. Pretty simple right? But before you get to wreck their crib, you have to push past defending towers, enemy NPCs, and enemy players.What do you do? You kill enemy NPCs, heroes, and towers. How you will accomplish this is a whole other story, but let’s just focus on what you will be doing when you play the game.
STEP 1: PICK A HERO (NO, NOT THAT ONE!)
Heroes are characters controlled by players. The first thing you do in the game is pick yours. Games can be won and lost at the hero pick, so it is crucial to have everyone contributing in a different way. Think of it like a Pokemon team. You wouldn’t have an entire team of just one type, right (don’t worry, there are more Pokemon analogies later). There are literally over a hundred heroes, which is overwhelming at first. Wait, what’s that guy do? What was that spell? DID HE JUST ONE SHOT ME? Knowing the strengths and weaknesses of each hero takes time and experience. However, they all share some key features.
Radiant vs. Dire Heroes
Radiant are the good guys and Dire are the bad guys, that’s it. Even if you are technically on the Dire team, you can still pick Radiant heroes and vice versa. No one seems to follow the lore like me, why can I never find a Dota RP group?!
Attributes
Each hero has three attributes, with one of those attributes being noticeably stronger than the other two. Heroes are broken down into these categories in the character select as well.
Strength: These guys have a lot of health and can recover it very quickly. Most strength heroes can take a lot of damage and dish it out as well. However, many of them are slow and don’t have a lot of mana to cast spells. These guys are good picks if you want to take a lot of damage.
Agility: They can attack very quickly and aren’t as susceptible to physical attacks. Agility heroes are often the backbone of a lot of teams. As a new player, you probably won’t be touching these types of heroes.
Intelligence: These heroes have a lot of mana and can regenerate it quickly, meaning they rely heavily on their spells. Many intelligence heroes are ranged and have low penalties for casting spells, thus are very easy to pick up for new players.
Ranged vs. Melee
Every hero has an “autoattack” which is just a basic attack that requires no mana. These are either close range (melee) or long range (ranged). For new players, it is best to stick with ranged heroes since you will be less likely to put yourself in danger.
Hero Roles
Roles are somewhat nebulous, but Valve has tried to break heroes down into their own categories. Here is a summary of types of heroes you will encounter and die to.
Carry: The backbone of your team. If your Dota team were a Pokemon team, the carry would be a level 100 Mewtwo while the rest of you are Pikachus. These heroes start off weak, but when they level up and buy powerful items, they can absolutely wreck anyone they come across. While all this sounds awesome, carries are not recommended for new players as they require a lot of knowledge and skill when it comes to leveling up quickly and obtaining the right items.
Ganker: Gankers specialize in eliminating specific heroes and catching them off guard. They’re like assassins. They typically do this early in the game, crippling the enemy team’s chance to gain levels and gold. Playing a ganker is also difficult for a new player, as you need to not only know when, where, and who to attack, but also must have the skills to successfully get a kill.
Support: AKA those guys no one picked in your game. Supports are there to selflessly help the team in thankless ways such as buying pivotal items such as wards and couriers, allowing carries to get more money and experience, and sacrificing themselves so their Anti-Mage doesn’t die so he can farm up a 15 minute Manta (you’ll get that joke one day). When starting off, these are the heroes that you will most likely gravitate to, because they are fairly simple to play as, have many active spells, can contribute without a significant gold or level advantage, and no one really gets angry at you if you die. Did you go 3/10 as Crystal Maiden? MVP.
Pusher: These heroes are good at getting rid of enemy creeps (NPCs you attack for gold and experience), which allows your creeps to push into the enemy territory more easily. Many of their spells do extra damage to buildings, and can force the enemy team to take a more defensive position. Some pushers are very newbie friendly and cross over with support.
Durable: AKA tanks. Durable heroes specialize at sitting there and allow themselves to get pummeled on while your teammates clean up. They are normally in the thick of the battle, and are expected to take enough punishment while everyone else gets ready to launch their offensive. The difficulty for these characters range, but there are some good durable heroes for newbies.
Jungler: These heroes can defeat neutral creeps in the jungle(a spacious area on both sides of the map) from the beginning of the game. While you can put any hero in a lane, some have a great advantage by starting the game in the jungle. You need to know the jungle layout and keep track of spawn times, so it is not recommended for new players.
Disabler: These heroes focus on nullifying the enemy by preventing them from contributing to a battle. It’s hard for the enemy carry to crush you in three hits when they can’t move or attack! Many characters have disable abilities, but some are focused around this idea. These characters are good for new players as a disable is useful all the time.
Initiator: These are the people who start team fights, allowing their team to have a strong advantage. These heroes are quite fun to play as, but execution is important. If you don’t initiate properly or in time, you could cost your team the battle or even the game.
There are some minor roles such as lane support, semi-carries, and roamers, but those are really very small sub-aspects to these larger roles.
Radiant vs. Dire Heroes
Radiant are the good guys and Dire are the bad guys, that’s it. Even if you are technically on the Dire team, you can still pick Radiant heroes and vice versa. No one seems to follow the lore like me, why can I never find a Dota RP group?!
Attributes
Each hero has three attributes, with one of those attributes being noticeably stronger than the other two. Heroes are broken down into these categories in the character select as well.
Strength: These guys have a lot of health and can recover it very quickly. Most strength heroes can take a lot of damage and dish it out as well. However, many of them are slow and don’t have a lot of mana to cast spells. These guys are good picks if you want to take a lot of damage.
Agility: They can attack very quickly and aren’t as susceptible to physical attacks. Agility heroes are often the backbone of a lot of teams. As a new player, you probably won’t be touching these types of heroes.
Intelligence: These heroes have a lot of mana and can regenerate it quickly, meaning they rely heavily on their spells. Many intelligence heroes are ranged and have low penalties for casting spells, thus are very easy to pick up for new players.
Ranged vs. Melee
Every hero has an “autoattack” which is just a basic attack that requires no mana. These are either close range (melee) or long range (ranged). For new players, it is best to stick with ranged heroes since you will be less likely to put yourself in danger.
Hero Roles
Roles are somewhat nebulous, but Valve has tried to break heroes down into their own categories. Here is a summary of types of heroes you will encounter and die to.
Carry: The backbone of your team. If your Dota team were a Pokemon team, the carry would be a level 100 Mewtwo while the rest of you are Pikachus. These heroes start off weak, but when they level up and buy powerful items, they can absolutely wreck anyone they come across. While all this sounds awesome, carries are not recommended for new players as they require a lot of knowledge and skill when it comes to leveling up quickly and obtaining the right items.
Ganker: Gankers specialize in eliminating specific heroes and catching them off guard. They’re like assassins. They typically do this early in the game, crippling the enemy team’s chance to gain levels and gold. Playing a ganker is also difficult for a new player, as you need to not only know when, where, and who to attack, but also must have the skills to successfully get a kill.
Support: AKA those guys no one picked in your game. Supports are there to selflessly help the team in thankless ways such as buying pivotal items such as wards and couriers, allowing carries to get more money and experience, and sacrificing themselves so their Anti-Mage doesn’t die so he can farm up a 15 minute Manta (you’ll get that joke one day). When starting off, these are the heroes that you will most likely gravitate to, because they are fairly simple to play as, have many active spells, can contribute without a significant gold or level advantage, and no one really gets angry at you if you die. Did you go 3/10 as Crystal Maiden? MVP.
Pusher: These heroes are good at getting rid of enemy creeps (NPCs you attack for gold and experience), which allows your creeps to push into the enemy territory more easily. Many of their spells do extra damage to buildings, and can force the enemy team to take a more defensive position. Some pushers are very newbie friendly and cross over with support.
Durable: AKA tanks. Durable heroes specialize at sitting there and allow themselves to get pummeled on while your teammates clean up. They are normally in the thick of the battle, and are expected to take enough punishment while everyone else gets ready to launch their offensive. The difficulty for these characters range, but there are some good durable heroes for newbies.
Jungler: These heroes can defeat neutral creeps in the jungle(a spacious area on both sides of the map) from the beginning of the game. While you can put any hero in a lane, some have a great advantage by starting the game in the jungle. You need to know the jungle layout and keep track of spawn times, so it is not recommended for new players.
Disabler: These heroes focus on nullifying the enemy by preventing them from contributing to a battle. It’s hard for the enemy carry to crush you in three hits when they can’t move or attack! Many characters have disable abilities, but some are focused around this idea. These characters are good for new players as a disable is useful all the time.
Initiator: These are the people who start team fights, allowing their team to have a strong advantage. These heroes are quite fun to play as, but execution is important. If you don’t initiate properly or in time, you could cost your team the battle or even the game.
There are some minor roles such as lane support, semi-carries, and roamers, but those are really very small sub-aspects to these larger roles.
ABILITIES, HOW YOU HELP/HURT PEOPLE
Every hero has a least four spells. When you level up, you get a single point to put into spells to make them more powerful, or into your stats (save that for later though) Some are active, which you cast manually, and some are passive, which you do not cast and give some sort of buff to your character. The active skills will have the hotkey on the skill. Some heroes also have “autocast” spells, which give some buff to your auto attack and costs mana. You need to press Alt+spell button to keep this automatically on, then press it again to turn it off. If you just press the button once, your next targeted attack will have the autocast buff. Depending on the spell, it may be targeted in a special way:
Unit: You click on the enemy or NPC you want to use the spell on. If you are out of range, your character will automatically mosey on over and cast it when it gets in range. Be careful not to misclick and thus wasting your attack.
Point: You click on either a hero or on the ground to cast it. Be careful when clicking on heroes though, as if they move too far out of range you may miscast it.
Instant: No targeting at all! These spells will automatically cast depending on where your hero is.
Area: Here, you are given a big blue circle that you can place on the ground. Your hero will cast the spell in that area. You should look forward to many embarrassing misses with these types of spells.
A few useful facts about abilities:
1. The number in the lower left corner of the spell is the “mana cost” which means how much mana (that blue bar) you need to cast it. If you don’t have enough, it will be faded out. Some spells don’t have mana costs, but these are rare.
2. Hover over the spell icon for information about the spell. It tells you what type of targeted spell it is, what it does, information about the damage or other effects, and the cooldown in the lower left corner. Sometimes you will see a green circle, around your character. That is the range of the targeted spell. If an enemy is in the circle, you can cast the spell. If not, your character will automatically run up to the enemy until it’s in range.
Ultimate, or “Ult” as the cool people say
This is your best spell. It is on the far right of the spell menu. You can level it up only three times, at levels 6, 11, and 16. If you don’t level it up at that time, you can do it the next level. It depends on the hero, but ultimates typically have long cooldowns and cost a lot of mana. These can be major game changers in battles, and inefficient use of them could spell doom for your team. The coolest ultimate is by far Tidehunter’s Ravage, it has been agreed upon.
Unit: You click on the enemy or NPC you want to use the spell on. If you are out of range, your character will automatically mosey on over and cast it when it gets in range. Be careful not to misclick and thus wasting your attack.
Point: You click on either a hero or on the ground to cast it. Be careful when clicking on heroes though, as if they move too far out of range you may miscast it.
Instant: No targeting at all! These spells will automatically cast depending on where your hero is.
Area: Here, you are given a big blue circle that you can place on the ground. Your hero will cast the spell in that area. You should look forward to many embarrassing misses with these types of spells.
A few useful facts about abilities:
1. The number in the lower left corner of the spell is the “mana cost” which means how much mana (that blue bar) you need to cast it. If you don’t have enough, it will be faded out. Some spells don’t have mana costs, but these are rare.
2. Hover over the spell icon for information about the spell. It tells you what type of targeted spell it is, what it does, information about the damage or other effects, and the cooldown in the lower left corner. Sometimes you will see a green circle, around your character. That is the range of the targeted spell. If an enemy is in the circle, you can cast the spell. If not, your character will automatically run up to the enemy until it’s in range.
Ultimate, or “Ult” as the cool people say
This is your best spell. It is on the far right of the spell menu. You can level it up only three times, at levels 6, 11, and 16. If you don’t level it up at that time, you can do it the next level. It depends on the hero, but ultimates typically have long cooldowns and cost a lot of mana. These can be major game changers in battles, and inefficient use of them could spell doom for your team. The coolest ultimate is by far Tidehunter’s Ravage, it has been agreed upon.
RECOMMENDED HEROES FOR BEGINNERS
This section is always controversial because people have their own opinions on who is best for beginners. Some say “just play who you want” but it is clear that some heroes require more knowledge and specific aspects than others. Playing a difficult hero or a hero that you cannot contribute with may make you disinterested in the game. Here are TEN heroes I recommend when first playing, in no specific order.
 Lich: I said in no specific order, but really he’s the best hero. Don’t deny it. He has fast movement speed, a strong attacking spell, a good defensive spell, a mana regeneration spell, and an extremely powerful ultimate in team fights. His spells allow you to not only get in some kills, but also give your team advantages to succeed as well.
 Lion: Lion’s ultimate is one of the most powerful single target spells in the game. If you just want to obliterate an enemy’s health bar, he’s your man. He also has a very good stun that can hit multiple heroes, which is always useful even if you are underleveled. His other spells, one which turns an enemy into a helpless frog and another which drains the enemy mana, are all extremely useful no matter what level you may be.
 Vengeful Spirit: She excels at making the enemies weaker and her teammates stronger. She has a good single target stun (an attack that immobilizes the enemy), and her other attacks buff your friends and debuff your enemies. Her ult, Swap, switches you with an enemy hero. This is great for chasing enemies or helping your team take down an enemy hero, but it also makes you more likely to get killed. However, this is expected, so no one will really get on to you for your noble sacrifice.
 Crystal Maiden: She has a stun, a good AOE damage attack, a mana regen passive that effects everyone, and her ultimate can do a lot of damage. Keep in mind that her ultimate is channeled, which means that she cannot move while it is happening. If you move her or make her cast another spell, it will CANCEL the attack. So just hit R once and sit there.
 Shadow Shaman: He can do anything. He can take out a lot of creeps or dish damage to heroes with his shock move, can turn a hero into a chicken so they can’t attack, can hold someone in place for a lengthy time (though he can also not move), and his ultimate is great for team fights or knocking down towers.
Witch Doctor: He has a stun that can hit multiple characters multiple times. It is extremely annoying as you can imagine. He can also heal himself and teammates, do damage over time (good for invisible enemies), and his ultimate (which is channeled like Maiden’s) can hit many enemies for a lot of damage.
 Sven: “Wait, isn’t he a carry? And didn’t you say don’t start with carries?” Sven got a massive buff recently, which means he can potentially be a carry, but he is very flexible. He has a stun that hits multiple people which does a lot of damage and AOE stuns are useful ALL THE TIME. He can also not only do a lot of damage, but take it as well. Even if you don’t level him up so much, just throw that stun out to instantly be useful.
 Sand King: He has a stun that can hit multiple heroes, he can turn invisible to escape enemies, a passive that lets him do a lot of damage to creeps, which makes it easier to get gold, and his ultimate is incredibly powerful. Please note that the first part of his ult is channeled, so don’t move him until AFTER the shockwaves start coming out.
 Tidehunter: HE HAS THE BEST ULTIMATE TAKE THAT ENIGMA. Just get close to everyone, hit R, boom you became a hero. His gush move is also does good damage and slows the enemy drastically.
 Ogre Magi: This guy doesn’t require a whole lot of items, and his stun can be absolutely devastating. He is very luck based, but hey, everyone could use a bit of luck.
But I want to play a carry…
Ok fine, if you HAVE to play a carry, try Sniper, Viper, or Drow Ranger. They don’t have too many active skills, and if the other team is bad enough, you can spiral out of control and kill everyone.
Ok you’ve picked your guy. Now…
Lich: I said in no specific order, but really he’s the best hero. Don’t deny it. He has fast movement speed, a strong attacking spell, a good defensive spell, a mana regeneration spell, and an extremely powerful ultimate in team fights. His spells allow you to not only get in some kills, but also give your team advantages to succeed as well.Lion: Lion’s ultimate is one of the most powerful single target spells in the game. If you just want to obliterate an enemy’s health bar, he’s your man. He also has a very good stun that can hit multiple heroes, which is always useful even if you are underleveled. His other spells, one which turns an enemy into a helpless frog and another which drains the enemy mana, are all extremely useful no matter what level you may be.Vengeful Spirit: She excels at making the enemies weaker and her teammates stronger. She has a good single target stun (an attack that immobilizes the enemy), and her other attacks buff your friends and debuff your enemies. Her ult, Swap, switches you with an enemy hero. This is great for chasing enemies or helping your team take down an enemy hero, but it also makes you more likely to get killed. However, this is expected, so no one will really get on to you for your noble sacrifice.Crystal Maiden: She has a stun, a good AOE damage attack, a mana regen passive that effects everyone, and her ultimate can do a lot of damage. Keep in mind that her ultimate is channeled, which means that she cannot move while it is happening. If you move her or make her cast another spell, it will CANCEL the attack. So just hit R once and sit there.Shadow Shaman: He can do anything. He can take out a lot of creeps or dish damage to heroes with his shock move, can turn a hero into a chicken so they can’t attack, can hold someone in place for a lengthy time (though he can also not move), and his ultimate is great for team fights or knocking down towers.Witch Doctor: He has a stun that can hit multiple characters multiple times. It is extremely annoying as you can imagine. He can also heal himself and teammates, do damage over time (good for invisible enemies), and his ultimate (which is channeled like Maiden’s) can hit many enemies for a lot of damage.Sven: “Wait, isn’t he a carry? And didn’t you say don’t start with carries?” Sven got a massive buff recently, which means he can potentially be a carry, but he is very flexible. He has a stun that hits multiple people which does a lot of damage and AOE stuns are useful ALL THE TIME. He can also not only do a lot of damage, but take it as well. Even if you don’t level him up so much, just throw that stun out to instantly be useful.Sand King: He has a stun that can hit multiple heroes, he can turn invisible to escape enemies, a passive that lets him do a lot of damage to creeps, which makes it easier to get gold, and his ultimate is incredibly powerful. Please note that the first part of his ult is channeled, so don’t move him until AFTER the shockwaves start coming out.Tidehunter: HE HAS THE BEST ULTIMATE TAKE THAT ENIGMA. Just get close to everyone, hit R, boom you became a hero. His gush move is also does good damage and slows the enemy drastically.Ogre Magi: This guy doesn’t require a whole lot of items, and his stun can be absolutely devastating. He is very luck based, but hey, everyone could use a bit of luck.But I want to play a carry…
Ok fine, if you HAVE to play a carry, try Sniper, Viper, or Drow Ranger. They don’t have too many active skills, and if the other team is bad enough, you can spiral out of control and kill everyone.
Ok you’ve picked your guy. Now…
STEP 2: BUY ITEMS (EAT TREES FOR VITAMINS)
Items are things you buy for your heroes to make them more powerful. What you make for each hero is typically called a “build.” When your hero spawns, the first thing you need to do is open the shop (on the right, you know, the big gold SHOP button) and buy items.
So what do I build with so and so?
Just build what Valve tells you to build. You can’t get fancy now, just go straight in order and buy them. You can play with interesting builds when you stop going 1-15.
How do I buy things?
You can buy most items anywhere on the map, but they will go to your stash, which you can only retrieve in the base. However, if you are in a shop, you can get the item right in your inventory. There are three types of shops in the game.
Base shops: The shop in your base, pretty self-explanatory. You can get any item here that is not exclusive to the secret shop.
Side shops: In the top and bottom lane, there are shops that any hero can purchase items at. While these shops do not have every items, they do have some useful ones when you are in the lane early in the game. The big ones are boots, magic sticks(they can heal you) , and teleport scrolls.
Secret shops: Each team has a secret shop located in section of the map. However, you can buy items from any secret shop (especially the enemy shop if you want to rub it in their face). You cannot buy items that are exclusive to the secret shop unless your hero is PHYSICALLY IN THE SHOP. Secret shop items have a little “s” logo on them. These shops help you build some of the most powerful items in the game, so the risk is worth the reward. However, if your courier is in the secret shop, you can buy things there if you control him. That way you don’t have to go all the way across the map to get one item.
If you want to buy an item, just drag it into your quick buy box on the right, and then a yellow outline will appear when you have enough money for it. Right click on the item you want to buy (or hotkey it to something) and it will go into your stash. DON’T BUY RECIPES FIRST. They don’t do anything until you have all the other parts.
Important and awesome items:
Courier: SOMEONE ON YOUR TEAM HAS TO BUY THIS AT THE BEGINNING NO EXCEPTION. If you are a support, you have to bite the bullet and get one. This guy carries items from your base to your heroes, so you don’t have to run back and forth. For 220 gold, you can upgrade him to a flying courier, which is faster. He automatically turns into a flying one when you buy it anywhere on the map. You can kill the enemy courier for a lot of gold.
Wards: Probably the most important item in the game. There are two types: “Observer Wards” which grant vision over a large area, and “Sentry Wards” which grant vision over a much smaller area, but can see invisible heroes. Your team will need Observer Wards every match. You can only buy FOUR before they go out of stock (though they will go back in stock after a cooldown), so don’t waste them.
Tango, Salve, Clarity: These are regen items that help heal you or recover your mana. When you first start the game, you always want to have some combination of these. DO NOT JUST BUY BOOTS AND TANGOS OR A BRACER OR SOMETHING. You will need those regen items as you will be so weak in lane. If the enemy is aggressive, takes you down to 20% health, and you have no recovery items because you really wanted those boots, then what?
Teleport Scroll: For only 135 gold, you can warp to any of your towers, or your base by double tapping the key bound to your item slot. Need to warp into a team fight? Need to escape like a coward? Is someone trying to sneak behind you? TP scrolls are useful and games can be won or lost because someone did or did not have them.
Boots: They give you extra movement speed, which sounds dull compared to other items that give you massive damage boosts, but movement is a huge part of the game, so get these early.
So what do I build with so and so?
Just build what Valve tells you to build. You can’t get fancy now, just go straight in order and buy them. You can play with interesting builds when you stop going 1-15.
How do I buy things?
You can buy most items anywhere on the map, but they will go to your stash, which you can only retrieve in the base. However, if you are in a shop, you can get the item right in your inventory. There are three types of shops in the game.
Base shops: The shop in your base, pretty self-explanatory. You can get any item here that is not exclusive to the secret shop.
Side shops: In the top and bottom lane, there are shops that any hero can purchase items at. While these shops do not have every items, they do have some useful ones when you are in the lane early in the game. The big ones are boots, magic sticks(they can heal you) , and teleport scrolls.
Secret shops: Each team has a secret shop located in section of the map. However, you can buy items from any secret shop (especially the enemy shop if you want to rub it in their face). You cannot buy items that are exclusive to the secret shop unless your hero is PHYSICALLY IN THE SHOP. Secret shop items have a little “s” logo on them. These shops help you build some of the most powerful items in the game, so the risk is worth the reward. However, if your courier is in the secret shop, you can buy things there if you control him. That way you don’t have to go all the way across the map to get one item.
If you want to buy an item, just drag it into your quick buy box on the right, and then a yellow outline will appear when you have enough money for it. Right click on the item you want to buy (or hotkey it to something) and it will go into your stash. DON’T BUY RECIPES FIRST. They don’t do anything until you have all the other parts.
Important and awesome items:
Courier: SOMEONE ON YOUR TEAM HAS TO BUY THIS AT THE BEGINNING NO EXCEPTION. If you are a support, you have to bite the bullet and get one. This guy carries items from your base to your heroes, so you don’t have to run back and forth. For 220 gold, you can upgrade him to a flying courier, which is faster. He automatically turns into a flying one when you buy it anywhere on the map. You can kill the enemy courier for a lot of gold.
Wards: Probably the most important item in the game. There are two types: “Observer Wards” which grant vision over a large area, and “Sentry Wards” which grant vision over a much smaller area, but can see invisible heroes. Your team will need Observer Wards every match. You can only buy FOUR before they go out of stock (though they will go back in stock after a cooldown), so don’t waste them.
Tango, Salve, Clarity: These are regen items that help heal you or recover your mana. When you first start the game, you always want to have some combination of these. DO NOT JUST BUY BOOTS AND TANGOS OR A BRACER OR SOMETHING. You will need those regen items as you will be so weak in lane. If the enemy is aggressive, takes you down to 20% health, and you have no recovery items because you really wanted those boots, then what?
Teleport Scroll: For only 135 gold, you can warp to any of your towers, or your base by double tapping the key bound to your item slot. Need to warp into a team fight? Need to escape like a coward? Is someone trying to sneak behind you? TP scrolls are useful and games can be won or lost because someone did or did not have them.
Boots: They give you extra movement speed, which sounds dull compared to other items that give you massive damage boosts, but movement is a huge part of the game, so get these early.
STEP 3: THE MAP (WHERE DO I GO?)
The map has so many intricacies that I don’t want to explain them all here (this guide is already too long). The map is broken up into three pathways called lanes. There are top, middle, and bottom lanes. These lanes have creeps (NPCs that both teams have that charge out from their base) and towers (defenses that will kill you if you get to close, DON’T GET CLOSE). You will go in these at the beginning, and repeatedly return to kill creeps or enemy heroes.
The Map: Five Tips
1. Easy Lane: Top is the easy lane for the Dire, and bottom is the easy lane for the Radiant. After you pick your heroes and items, try your best to reserve a spot in this lane. That’s because it’s easier to pull the enemy into a position for them to be caught off guard and slaughtered. Why? Because more than likely the easy lane team will want to fight near their tower, which means the other team can easily be ambushed by someone hiding behind them, or attacked by the tower.
2. River, the tunnel of death: The river is great because it has runes (items that can give you temporary stat buffs) that spawn EVERY TWO MINUTES, but it is also narrow with limited areas for escape. Don’t wander in here aimlessly unless you want to be trapped and maimed.
3. Block… OK NOT THAT MUCH: Sometimes, you might want to block your waves by walking back and forth in front of them, making them bump into you and stop. The point of this is so you fight closer to your tower, which makes it safer. However, if you do it too much, the creeps will be in tower range, which means it will be harder to kill them for extra gold, and they could get in some cheap shots on your tower. You have to find the sweet spot.
4. Jungle, the place where you got killed: Jungles, that big forest area near the easy lanes, are a great place to get ambushed, even your own jungle. Be extra careful when wandering around there, as they are big and mazelike so if you do get jumped, you might not have a good outlet to escape.
5. WARDS SHOULD BE UP AT ALL TIMES: I will take more about it in the item section, but you need to buy an item called “Observer Wards” for 150 gold and put them on these eyeball marks near the river all the time. There are more advanced warding strategies (warding the enemy jungle is a great way to keep an eye on them), but really if you put wards on those eyeballs, that’s good enough for now.
The Map: Five Tips
1. Easy Lane: Top is the easy lane for the Dire, and bottom is the easy lane for the Radiant. After you pick your heroes and items, try your best to reserve a spot in this lane. That’s because it’s easier to pull the enemy into a position for them to be caught off guard and slaughtered. Why? Because more than likely the easy lane team will want to fight near their tower, which means the other team can easily be ambushed by someone hiding behind them, or attacked by the tower.
2. River, the tunnel of death: The river is great because it has runes (items that can give you temporary stat buffs) that spawn EVERY TWO MINUTES, but it is also narrow with limited areas for escape. Don’t wander in here aimlessly unless you want to be trapped and maimed.
3. Block… OK NOT THAT MUCH: Sometimes, you might want to block your waves by walking back and forth in front of them, making them bump into you and stop. The point of this is so you fight closer to your tower, which makes it safer. However, if you do it too much, the creeps will be in tower range, which means it will be harder to kill them for extra gold, and they could get in some cheap shots on your tower. You have to find the sweet spot.
4. Jungle, the place where you got killed: Jungles, that big forest area near the easy lanes, are a great place to get ambushed, even your own jungle. Be extra careful when wandering around there, as they are big and mazelike so if you do get jumped, you might not have a good outlet to escape.
5. WARDS SHOULD BE UP AT ALL TIMES: I will take more about it in the item section, but you need to buy an item called “Observer Wards” for 150 gold and put them on these eyeball marks near the river all the time. There are more advanced warding strategies (warding the enemy jungle is a great way to keep an eye on them), but really if you put wards on those eyeballs, that’s good enough for now.
STEP 4: ACTUALLY DOING SOMETHING (I’M IN THE LANE… NOW WHAT?)
You picked your hero, you bought your items, you got in a lane. The creeps are rushing behind you… now what?
1. The creeps will clash and battle each other. Your job is to gain experience by being near enemy creeps when they die or killing them for extra experience and gold.
2. Stay behind your creeps and try to get the killing blow on enemy creeps. Keep in mind the enemy will be doing this too, and you will be trading pot shots at each other as well.
3. If you are having trouble killing creeps, keep in mind that you still get experience by being near them, and you are given gold every second of the game. There’s no difference between hitting a creep once without killing it and just standing next to it as it dies. The range for this is about the lengthy of your screen, emphasis on “about.” So really only focus on the killing blow, which are known as “last hits.”
Last Hitting: The most important skill in the game. Last hitting is when you give the killing blow to an enemy creep, which gives you bonus experience and gold. No matter what character you play, you need to know how to do this. Obviously if you are a support you won’t need to do it as much as a carry, but you still need money for your items and support items. Last hitting takes a lot of practice and it’s easier to last hit with some compared to others. There are several strategies to last hitting. You can right click on the creep to attack it, move your hero next to a creep low on health if you have autoattack on (it’s on by default), or press A then left click (do this to kill your creeps so the enemy doesn’t get a lot of experience). If you want to practice last hitting, make a bot game, where you are the only hero, go mid, and practice for about ten minutes. Keep trying to top your score. Obviously it takes skill and practice, but the big thing is that you need to always be aware that you should be trying to get last hits, not just helping to kill the creep.
But I’m letting the carry get all the last hits: Ok, sometimes this has to happen, but still try to get last hits when you can. Is there a last hit that the carry absolutely cannot get? Take it.
So do I just stay in this lane forever or…: The beginning of the game AKA early game AKA laning phase revolves around people getting early levels and items before they do something big like attempt to kill enemy heroes or knock down towers. You should at least get to level six so you can have your ultimate before you start bumbling around the map.
When do I push down the tower?: A lot of new players think you need to push down the towers as fast as possible. Before you make a real attempt to take down a tower, ask yourself these questions:
1. Can the enemy catch me off guard and kill me (i.e. coming up behind me or rushing past their tower)?
2. Am I strong enough to do noticeable damage to the tower?
3. Am I really going to do a lot of damage to it, or just push the creeps up to a more favorable position for the enemy?
The reason why people don’t try to destroy towers right away is so they can get enough gold and experience first to be able to take one down. If you push the creeps all the way to their tower, but it’s barely taking any damage, you are giving them a safe area to farm and to possibly kill you.
1. The creeps will clash and battle each other. Your job is to gain experience by being near enemy creeps when they die or killing them for extra experience and gold.
2. Stay behind your creeps and try to get the killing blow on enemy creeps. Keep in mind the enemy will be doing this too, and you will be trading pot shots at each other as well.
3. If you are having trouble killing creeps, keep in mind that you still get experience by being near them, and you are given gold every second of the game. There’s no difference between hitting a creep once without killing it and just standing next to it as it dies. The range for this is about the lengthy of your screen, emphasis on “about.” So really only focus on the killing blow, which are known as “last hits.”
Last Hitting: The most important skill in the game. Last hitting is when you give the killing blow to an enemy creep, which gives you bonus experience and gold. No matter what character you play, you need to know how to do this. Obviously if you are a support you won’t need to do it as much as a carry, but you still need money for your items and support items. Last hitting takes a lot of practice and it’s easier to last hit with some compared to others. There are several strategies to last hitting. You can right click on the creep to attack it, move your hero next to a creep low on health if you have autoattack on (it’s on by default), or press A then left click (do this to kill your creeps so the enemy doesn’t get a lot of experience). If you want to practice last hitting, make a bot game, where you are the only hero, go mid, and practice for about ten minutes. Keep trying to top your score. Obviously it takes skill and practice, but the big thing is that you need to always be aware that you should be trying to get last hits, not just helping to kill the creep.
But I’m letting the carry get all the last hits: Ok, sometimes this has to happen, but still try to get last hits when you can. Is there a last hit that the carry absolutely cannot get? Take it.
So do I just stay in this lane forever or…: The beginning of the game AKA early game AKA laning phase revolves around people getting early levels and items before they do something big like attempt to kill enemy heroes or knock down towers. You should at least get to level six so you can have your ultimate before you start bumbling around the map.
When do I push down the tower?: A lot of new players think you need to push down the towers as fast as possible. Before you make a real attempt to take down a tower, ask yourself these questions:
1. Can the enemy catch me off guard and kill me (i.e. coming up behind me or rushing past their tower)?
2. Am I strong enough to do noticeable damage to the tower?
3. Am I really going to do a lot of damage to it, or just push the creeps up to a more favorable position for the enemy?
The reason why people don’t try to destroy towers right away is so they can get enough gold and experience first to be able to take one down. If you push the creeps all the way to their tower, but it’s barely taking any damage, you are giving them a safe area to farm and to possibly kill you.
STEP 5: PEOPLE ARE MOVING AROUND OH GOD THEY’RE COMING FOR ME
After you’ve leveled up a bit, and maybe even took down a tower (or lost one), people will start to roam around the map trying to knock down towers in different lanes, trying to kill enemies, or trying to place wards to give vision. This is known as “mid game.” No one really announces when to start doing this, but you will develop a feel for when it’s time to move out of your lane (or when your teammate is screaming at you).
I’m like level 10 now, where do I go?: This depends on what’s happening in your game. Maybe you need to go to another lane to defend or attack a tower. Maybe an enemy is in an open spot where you can kill them. Maybe you need to put more wards down. Maybe you need to stay right next to your tower because the entire enemy team is coming for you. Talk to your team and assess what’s happening.
What else do I need to do in the game?: That’s really it. You talk to your team, strategize, try to defeat enemies and their towers. “Late game” refers to when everyone is at high levels with powerful items. This is when you really need to focus and be careful, as one incident could win or lose the game.
CONGRATS YOU PLAYED DOTA AND KIND OF KNEW WHAT TO DO. A monumental achievement. Now do it again, several thousand times. The rest of the guide will focus on general tips or issues new players have.
I’m like level 10 now, where do I go?: This depends on what’s happening in your game. Maybe you need to go to another lane to defend or attack a tower. Maybe an enemy is in an open spot where you can kill them. Maybe you need to put more wards down. Maybe you need to stay right next to your tower because the entire enemy team is coming for you. Talk to your team and assess what’s happening.
What else do I need to do in the game?: That’s really it. You talk to your team, strategize, try to defeat enemies and their towers. “Late game” refers to when everyone is at high levels with powerful items. This is when you really need to focus and be careful, as one incident could win or lose the game.
CONGRATS YOU PLAYED DOTA AND KIND OF KNEW WHAT TO DO. A monumental achievement. Now do it again, several thousand times. The rest of the guide will focus on general tips or issues new players have.
HOTKEYS: IT’S ALL IN THE FINGERS
Ok, everyone has their own hotkey ideas, and it’s really up to the person. Here is what I use and my reasoning. I’m going to assume you will have your left hand on the WASD keys out of habit as I do, so my hotkeys are really based around that.
Select hero (Space Bar, once to select, twice to center camera): Obviously you need to keep an eye on your hero, and the space bar is very accessible and easy to quickly hit in the heat of the moment.
Call courier (B, once to select, twice to center camera). The B key is also easily reachable with the WASD layout. The courier has his own little hotkey combo that you may need to memorize. I keep that at default, and it’s not too difficult to remember.
Items (DF1234): If you have your hand on WASD, of course the D and F keys are instantly reachable. In reality, you probably won’t have an absurd amount of active items, typically maybe two or three. The D and F keys allow for immediate response instead of accidentally hitting the wrong key.
Spells (QWER): Yes, the default. This was clearly modeled after WASD people, and it works well for us.
Select hero (Space Bar, once to select, twice to center camera): Obviously you need to keep an eye on your hero, and the space bar is very accessible and easy to quickly hit in the heat of the moment.
Call courier (B, once to select, twice to center camera). The B key is also easily reachable with the WASD layout. The courier has his own little hotkey combo that you may need to memorize. I keep that at default, and it’s not too difficult to remember.
Items (DF1234): If you have your hand on WASD, of course the D and F keys are instantly reachable. In reality, you probably won’t have an absurd amount of active items, typically maybe two or three. The D and F keys allow for immediate response instead of accidentally hitting the wrong key.
Spells (QWER): Yes, the default. This was clearly modeled after WASD people, and it works well for us.
FIVE THINGS YOU SHOULD BE DOING EVERY MATCH
1. Communicating with your team: Via text, voice, chat wheel (Y by default to select pre-canned responses), it doesn’t matter, just do it. Communication is extremely important so people don’t waste their time, or build items that have bad synergy (do we need three mekanisms?)
2. Warding: Here we go again. If not you, at least somebody. If nobody, then YOU.
3. Picking someone who fits with the team: Does your team need someone who has a move that can stun the enemy? Pick that hero. Do they need someone to help protect their carry so he can farm? Then pick them. I know you may go into games wanting to play someone, but if you just want to practice, try a bot game first.
4. Knowing your role: Are you Tidehunter, who has a great ultimate for initiating team fights? Were you anywhere near that last team fight? No? Well you should have been. You need to know what your hero should be doing and what is the best way for them to contribute.
5. Knowing where everyone is: Where is the enemy? Where is your team? You obviously can’t know where every enemy is at every second, but over time you will be able to assess it better. If you don’t see the enemy at all, it’s probably not wise to wander around by yourself.
2. Warding: Here we go again. If not you, at least somebody. If nobody, then YOU.
3. Picking someone who fits with the team: Does your team need someone who has a move that can stun the enemy? Pick that hero. Do they need someone to help protect their carry so he can farm? Then pick them. I know you may go into games wanting to play someone, but if you just want to practice, try a bot game first.
4. Knowing your role: Are you Tidehunter, who has a great ultimate for initiating team fights? Were you anywhere near that last team fight? No? Well you should have been. You need to know what your hero should be doing and what is the best way for them to contribute.
5. Knowing where everyone is: Where is the enemy? Where is your team? You obviously can’t know where every enemy is at every second, but over time you will be able to assess it better. If you don’t see the enemy at all, it’s probably not wise to wander around by yourself.
FIVE THINGS YOU SHOULDN’T BE DOING EVERY MATCH (BUT PROBABLY ARE)
1. Dying: Ok, you will die pretty much every match, it’s a given. But there’s a difference between unavoidable deaths, and deaths caused by silly mistakes. These mistakes could be A) going too far past the creep line into the enemy territory B) going somewhere dangerous when you don’t know where they are C)trying to kill someone and failing terribly D)chasing an enemy that is leading you into a trap etc. It’s better to play conservatively than to give the enemy free gold every three minutes.
2. Spamming spells for last hits or whatever reason: Some heroes can spam their spells easily, but others can’t. If your main harassment spell takes up half your mana, it probably isn’t wise to use it every ten seconds.
3. Nothing: Are you standing around doing nothing? Stop that! You’re wasting time, money, and experience. Go kill creeps, help a teammate, put wards down, anything but just standing around. Make opportunities, don’t wait for them.
4. Making some wacky item: Dota is not as simple as “buy the item with the biggest damage boost.” You should be making items that suit your character. Really, just follow the recommended items Valve tell you to buy. Some heroes kind of make me wonder about their item recommendations, but largely it is effective.
5. Going Rambo: Don’t even try to fight an enemy one on one unless you have some strong advantage. Even if you think you might possibly be in danger if you try to attack someone, don’t do it. Genghis Khan said “only a fool fights a battle he knows he cannot win.” LISTEN TO GENGHIS KHAN.
2. Spamming spells for last hits or whatever reason: Some heroes can spam their spells easily, but others can’t. If your main harassment spell takes up half your mana, it probably isn’t wise to use it every ten seconds.
3. Nothing: Are you standing around doing nothing? Stop that! You’re wasting time, money, and experience. Go kill creeps, help a teammate, put wards down, anything but just standing around. Make opportunities, don’t wait for them.
4. Making some wacky item: Dota is not as simple as “buy the item with the biggest damage boost.” You should be making items that suit your character. Really, just follow the recommended items Valve tell you to buy. Some heroes kind of make me wonder about their item recommendations, but largely it is effective.
5. Going Rambo: Don’t even try to fight an enemy one on one unless you have some strong advantage. Even if you think you might possibly be in danger if you try to attack someone, don’t do it. Genghis Khan said “only a fool fights a battle he knows he cannot win.” LISTEN TO GENGHIS KHAN.
DOTA DICTIONARY FOR DUMMIES
Dota has a lot of lingo, and players have their own set of short hand phrases. This is immensely confusing at first. This is not 100% comprehensive, but here are some things you will hear.
b: Short for “back” which means “GET BACK RETREAT YOU WILL DIE IF YOU STAY THERE.”
Burst damage: a lot of damage suddenly given out at one time.
BKB: Short for Black King Bar, an item that makes a hero magic immune (which means you can't cast spells on them. There are some exceptions, but they will still take no damage.)
cc: short for "crowd control" which refers to how to disable heroes in team fights. If a hero has good cc, that means they can easily use their abilities to take people out of a fight.
Creep line: Refers to the line of creeps whacking on each other
Creep wave: refers to a batch of creeps that come out of the base
Crow: short for the courier, specifically flying courier. If someone says “recrow” that means they accidentally (or purposefully) changed its route from you.
Deny: refers to killing your own creeps or towers, resulting in the enemy not getting experience or money. You can only do this if your creep or tower is below 10% HP.
Farm: as a noun, refers to how much gold and experience someone has. As a verb, it means to obtain gold and experience.
Fat: refers to a character who is at a high level or has obtained very powerful items
Feed/feeding/fed: refers to heroes dying to each other. If you die multiple times to some hero, that means you are “feeding” that character gold and experience, which results in them being “fed” or “fat.”
Furion: refers to the hero Nature’s Prophet
Gank: refers to killing or attempting to kill an enemy hero by surprise.
Hard carry: refers to carries that perform extremely well once at a sufficient level and with enough items
Jungling: taking down neutral creeps in the jungle
Mega creep: super creeps that appear when barracks have been destroyed
Mek: short for Mekanism, a healing item. If you are a support, you will probably be making this.
Mis/miss/mia: Short for “missing” which means the enemy cannot be seen in their lane and may be coming to another one to attack your teammates.
Naix: refers to the hero Lifestealer.
Nuke: a powerful spell that does a lot of damage
OOM: short for “out of mana” which means they can’t cast spells
Pipe: short for Pipe of Insight, an item that reduces magic damage
POTM: refers to the hero Mirana (Priestess of the Moon)
Pulling: refers to attacking creeps in the jungle, running to the lane, and having your creeps fight the neutral creeps. This causes your creep wave to be distracted, which allows you to be closer to your tower or deny the enemy experience.
Racks/Rax: short for “barracks”
Re: short for “return” which means an enemy previously thought missing has returned to their lane
Rhasta: refers to the hero Shadow Shaman
Rosh: short for Roshan, the powerful enemy creep near the middle of the map. Once killed, he drops an item that can revive a single hero, and everyone gets a lot of gold and experience. It takes the entire team to defeat him, so don’t rush in there by yourself. When people say “we should Rosh” or “they’re Roshing!” that means attacking Roshan.
Silence: a status effect that results in you being unable to cast spells
Sheepstick: refers to the Scythe of Vyse, which turns heroes into a defenseless pig (a sheep in Dota 1). If you play an intelligence hero, you will hopefully make one of these if you can afford it.
ss: Short for “missing” which means the enemy cannot be seen in their lane and may be coming to another one to attack your teammates.
Stacking: a technique where you attack a neutral creep camp when the clock ends with :53, and run away. They will chase you, but since it will turn :00 before they return, another creep camp will spawn in its, but the first creeps will return. This is useful for allowing your carries to farm.
Stun: a move that completely immobilizes the enemy. These are extremely important in every game.
Team fight: a fight where many if not all players on both teams are engaged. If someone says “we have no team fight” that means you don’t have a hero that has spells that excel in these situations.
TP: short for teleport i.e. from a teleport scroll
Truesight: You can see invisible enemies or objects. Towers have this, and some items give you this as well.
Wards/warding: refers to observer wards and placing them on the map
b: Short for “back” which means “GET BACK RETREAT YOU WILL DIE IF YOU STAY THERE.”
Burst damage: a lot of damage suddenly given out at one time.
BKB: Short for Black King Bar, an item that makes a hero magic immune (which means you can't cast spells on them. There are some exceptions, but they will still take no damage.)
cc: short for "crowd control" which refers to how to disable heroes in team fights. If a hero has good cc, that means they can easily use their abilities to take people out of a fight.
Creep line: Refers to the line of creeps whacking on each other
Creep wave: refers to a batch of creeps that come out of the base
Crow: short for the courier, specifically flying courier. If someone says “recrow” that means they accidentally (or purposefully) changed its route from you.
Deny: refers to killing your own creeps or towers, resulting in the enemy not getting experience or money. You can only do this if your creep or tower is below 10% HP.
Farm: as a noun, refers to how much gold and experience someone has. As a verb, it means to obtain gold and experience.
Fat: refers to a character who is at a high level or has obtained very powerful items
Feed/feeding/fed: refers to heroes dying to each other. If you die multiple times to some hero, that means you are “feeding” that character gold and experience, which results in them being “fed” or “fat.”
Furion: refers to the hero Nature’s Prophet
Gank: refers to killing or attempting to kill an enemy hero by surprise.
Hard carry: refers to carries that perform extremely well once at a sufficient level and with enough items
Jungling: taking down neutral creeps in the jungle
Mega creep: super creeps that appear when barracks have been destroyed
Mek: short for Mekanism, a healing item. If you are a support, you will probably be making this.
Mis/miss/mia: Short for “missing” which means the enemy cannot be seen in their lane and may be coming to another one to attack your teammates.
Naix: refers to the hero Lifestealer.
Nuke: a powerful spell that does a lot of damage
OOM: short for “out of mana” which means they can’t cast spells
Pipe: short for Pipe of Insight, an item that reduces magic damage
POTM: refers to the hero Mirana (Priestess of the Moon)
Pulling: refers to attacking creeps in the jungle, running to the lane, and having your creeps fight the neutral creeps. This causes your creep wave to be distracted, which allows you to be closer to your tower or deny the enemy experience.
Racks/Rax: short for “barracks”
Re: short for “return” which means an enemy previously thought missing has returned to their lane
Rhasta: refers to the hero Shadow Shaman
Rosh: short for Roshan, the powerful enemy creep near the middle of the map. Once killed, he drops an item that can revive a single hero, and everyone gets a lot of gold and experience. It takes the entire team to defeat him, so don’t rush in there by yourself. When people say “we should Rosh” or “they’re Roshing!” that means attacking Roshan.
Silence: a status effect that results in you being unable to cast spells
Sheepstick: refers to the Scythe of Vyse, which turns heroes into a defenseless pig (a sheep in Dota 1). If you play an intelligence hero, you will hopefully make one of these if you can afford it.
ss: Short for “missing” which means the enemy cannot be seen in their lane and may be coming to another one to attack your teammates.
Stacking: a technique where you attack a neutral creep camp when the clock ends with :53, and run away. They will chase you, but since it will turn :00 before they return, another creep camp will spawn in its, but the first creeps will return. This is useful for allowing your carries to farm.
Stun: a move that completely immobilizes the enemy. These are extremely important in every game.
Team fight: a fight where many if not all players on both teams are engaged. If someone says “we have no team fight” that means you don’t have a hero that has spells that excel in these situations.
TP: short for teleport i.e. from a teleport scroll
Truesight: You can see invisible enemies or objects. Towers have this, and some items give you this as well.
Wards/warding: refers to observer wards and placing them on the map
HOW TO DEAL WITH INVISIBLE HEROES
Invisible heroes are a big hassle to early Dota players. They can come out of nowhere at seemingly any time, and even if you do a lot of damage, they can vanish without a trace. Here’s how you can stop invisible enemies.
Truesight items: Items that allow you to see enemies heroes. First is Dust of Appearance(180 gold), or just dust for short. When used, it causes the immediate area to have true sight for a short time. Next is sentry wards (200 gold). Like observer wards, you place them and the area near by has true sight. Last, is Gem of True Sight (850 gold), which automatically gives permanent true sight to the area around the holder. This is the best option for taking down enemy heroes, but keep in mind that when the holder is killed, the item is dropped, which means that the enemy can pick it up (but teammates can as well). You can also destroy the gem by attacking it, which can be useful if you have invisible heroes on your team. You can buy all these items from the base shop (you can use the search bar in the shop to find them quickly).
Silence: If they are silenced, they can’t cast spells and they can’t go invisible. Some heroes have silence abilities and some items have some as well. Keep this in mind if you see someone pick an invisible hero.
Abilities with True Sight: Slardar’s Amplify Damage and Bounty Hunter’s Track allow invisible heroes to be seen as long as you used the move on the hero when they were visible. Zeus’ ultimate also reveals invisible heroes, but only for a very short time.
Stuns/Burst Damage: Many invisible heroes can’t take a lot of punishment, so stunning them, which allows for more time to attack, or having skills that do a lot of quick damage can be ideal for harassing them.
Truesight items: Items that allow you to see enemies heroes. First is Dust of Appearance(180 gold), or just dust for short. When used, it causes the immediate area to have true sight for a short time. Next is sentry wards (200 gold). Like observer wards, you place them and the area near by has true sight. Last, is Gem of True Sight (850 gold), which automatically gives permanent true sight to the area around the holder. This is the best option for taking down enemy heroes, but keep in mind that when the holder is killed, the item is dropped, which means that the enemy can pick it up (but teammates can as well). You can also destroy the gem by attacking it, which can be useful if you have invisible heroes on your team. You can buy all these items from the base shop (you can use the search bar in the shop to find them quickly).
Silence: If they are silenced, they can’t cast spells and they can’t go invisible. Some heroes have silence abilities and some items have some as well. Keep this in mind if you see someone pick an invisible hero.
Abilities with True Sight: Slardar’s Amplify Damage and Bounty Hunter’s Track allow invisible heroes to be seen as long as you used the move on the hero when they were visible. Zeus’ ultimate also reveals invisible heroes, but only for a very short time.
Stuns/Burst Damage: Many invisible heroes can’t take a lot of punishment, so stunning them, which allows for more time to attack, or having skills that do a lot of quick damage can be ideal for harassing them.
ANNOYING HEROES YOU WILL COME ACROSS AS A BEGINNER (AND HOW TO DEAL WITH THEM)
Some heroes are less obvious to counter than others. Be careful around these heroes, but also know that there is a way to stop them.
 Riki: The king of invisible heroes. His ultimate can permanently turn him invisible, which means he is seen more often than not. He also has a purple smoke move that can silence you. Simply walk out of the smoke to get rid of the status effect. Read the invisible hero section for how to get rid of him.

 Anti-Mage/Queen of Pain: These heroes have a move called blink, which means they can instantly warp to and from a nearby point. This means that they can pop in and out at any time. Using disabling moves like silences and stuns can help keep them in their place.
 Hard Carries like Faceless Void, Drow Ranger, Phantom Assassin etc.: When hard carries get powerful enough, they can demolish you in split seconds. The trick is, when you know a hero can spiral out of control quickly, focus a lot of early harassment on them so they are slow to gain experience or gold. Failing that, have some sort of disable that keeps them from participating in fights is useful (Scythe of Vyse is very good against these types of heroes).
Keeper of the Light: He has a move that can demolish creep waves and do a TON of damage to you. However, it is easy to know when its coming and fairly easy to dodge. Keeper also cannot take a lot of damage, so if you catch him off guard, he can’t do much.
 Pudge: This guy can pull you to him, and then stun you for a lengthy time his ultimate. Even if you try to escape, he has an AOE slowing move that also does damage. With time, you will know his typical hiding spots. The general rule of the thumb is, if you don’t know where he is, and you are near a place he could be hiding, he probably is there. Surrounding yourself around creeps is also great for making him miss. Pudge doesn’t have a lot of mana and one of his moves hurts himself, so make him waste his mana and health.
 Phantom Lancer: He can make illusions, or copies, of himself, which means often you have no idea which is the real one. Having AOE attacks is good for figuring out who is who (the illusions would take more damage), and true sight is useful as he has a move where he turns invisible.
Riki: The king of invisible heroes. His ultimate can permanently turn him invisible, which means he is seen more often than not. He also has a purple smoke move that can silence you. Simply walk out of the smoke to get rid of the status effect. Read the invisible hero section for how to get rid of him.Anti-Mage/Queen of Pain: These heroes have a move called blink, which means they can instantly warp to and from a nearby point. This means that they can pop in and out at any time. Using disabling moves like silences and stuns can help keep them in their place.Hard Carries like Faceless Void, Drow Ranger, Phantom Assassin etc.: When hard carries get powerful enough, they can demolish you in split seconds. The trick is, when you know a hero can spiral out of control quickly, focus a lot of early harassment on them so they are slow to gain experience or gold. Failing that, have some sort of disable that keeps them from participating in fights is useful (Scythe of Vyse is very good against these types of heroes).Keeper of the Light: He has a move that can demolish creep waves and do a TON of damage to you. However, it is easy to know when its coming and fairly easy to dodge. Keeper also cannot take a lot of damage, so if you catch him off guard, he can’t do much.Pudge: This guy can pull you to him, and then stun you for a lengthy time his ultimate. Even if you try to escape, he has an AOE slowing move that also does damage. With time, you will know his typical hiding spots. The general rule of the thumb is, if you don’t know where he is, and you are near a place he could be hiding, he probably is there. Surrounding yourself around creeps is also great for making him miss. Pudge doesn’t have a lot of mana and one of his moves hurts himself, so make him waste his mana and health.Phantom Lancer: He can make illusions, or copies, of himself, which means often you have no idea which is the real one. Having AOE attacks is good for figuring out who is who (the illusions would take more damage), and true sight is useful as he has a move where he turns invisible.
ANNOYING MOVES YOU WILL COME ACROSS (AND HOW TO DEAL WITH THEM)
Axe’s Battle Hunger: This move does damage over time (you will have a bull head above you when it’s active). However, you can get rid of it if you get the last hit on something, whether it be a hero, enemy creep, or even denying a friendly creep.Keeper of the Light’s Illuminate: This is a channeled spell which since a wave of damage hurdling straight ahead of him. The range on this is absurdly long, and it can do massive damage early in the game. However, the move is channeled, which means you can easily tell when he is about to use it, and thus you can dodge it easier.Silencer’s Curse of the Silent/Last Word: Curse of the Silent saps your health and mana, but can preemptively go away by casting a spell. Silencer will combo this with Last Word, which cause you to take damage and be silence if you cast a spell. If you don’t cast one, you will still take damage, and also be disarmed which means you can’t even auto attack. Heroes with spammable spells are good at avoiding this damage, and making Silencer waste his mana.Bloodseeker's Rupture: When he cast this on you, you will hear a loud sound and will start spurting blood. If you move, it will do additional damage to you. DON'T MOVE. Press H to make your character completely stop. He may come up to whack on you some, so you might have to retreat a bit given the situation.Venomancer’s Venomous Gale: Possibly the most devastating level 1 move in the game. It does initial damage, damage over time, and slows you down drastically. If you get caught off guard and he put this on you, you are as good as dead. The trick is to be very cautious around him early in the game. It also cost a ton of mana, so making him waste it would be beneficial as well.Witch Doctor’s Paralyzing Cask: An annoying stun that can hit you multiple times. It bounces from enemy to enemy, so if you are in lane, try to move away from the creeps when you see it coming.Dark Seer’s Ion Shell: He will put a purple bubble around a creep, causing anyone near it to take damage. If you can, try to focus on eliminating that creep as quickly as possible. Failing that, just move away from it. Dark Seer doesn’t have a whole lot of mana early on, so try to get him to waste that move.
USEFUL WEBSITES
Dota 2 Wiki (http://www.dota2wiki.com/wiki/Dota_2_Wiki): This is the wiki for Dota 2. Most of the pictures here are stolen from that site. It has information on every hero, item, and game mechanic. It is definitely an invaluable resource.
Official Dota 2 Blog (http://blog.dota2.com/): Valve’s official blog about Dota 2. It has news, update notes, and of course a link to the cosmetic store.
Dota 2 Alt Tab (http://www.dota2alttab.com/): This site has mini guides for each hero. You can pull up this website with the Steam browser to check on how to level up your hero or what items you should focus on.
Play Dota (http://www.playdota.com/): A huge Dota 1 resource website. They have a ton of guides, but it may be confusing since all the icons and names are from Dota 1. You can download a Firefox app that makes the icons revert to Dota 2 ones though.
Dota Cinema (https://www.youtube.com/user/DotaCinema): A Youtube channel that has a ton of Dota 2 videos, ranging from basic information, strategies, hero guides, and more.
Purge Gamers (https://www.youtube.com/user/PurgeGamers): Another Dota related Youtube channel. This one has a lot of match replays with commentary, so it’s good to see how other people tackle the game.
Cyborgmatt (http://www.cyborgmatt.com/): After every update, Cyborgmatt does an extensive breakdown on all of the added content. Very cool to see what Valve may have in store in the coming days/weeks.
Pyrion Flax (https://www.youtube.com/user/tedhimself): Comedy guides about Dota 2. Very funny if not always informative.
Official Dota 2 Blog (http://blog.dota2.com/): Valve’s official blog about Dota 2. It has news, update notes, and of course a link to the cosmetic store.
Dota 2 Alt Tab (http://www.dota2alttab.com/): This site has mini guides for each hero. You can pull up this website with the Steam browser to check on how to level up your hero or what items you should focus on.
Play Dota (http://www.playdota.com/): A huge Dota 1 resource website. They have a ton of guides, but it may be confusing since all the icons and names are from Dota 1. You can download a Firefox app that makes the icons revert to Dota 2 ones though.
Dota Cinema (https://www.youtube.com/user/DotaCinema): A Youtube channel that has a ton of Dota 2 videos, ranging from basic information, strategies, hero guides, and more.
Purge Gamers (https://www.youtube.com/user/PurgeGamers): Another Dota related Youtube channel. This one has a lot of match replays with commentary, so it’s good to see how other people tackle the game.
Cyborgmatt (http://www.cyborgmatt.com/): After every update, Cyborgmatt does an extensive breakdown on all of the added content. Very cool to see what Valve may have in store in the coming days/weeks.
Pyrion Flax (https://www.youtube.com/user/tedhimself): Comedy guides about Dota 2. Very funny if not always informative.